Silent No More: The Ultimate Guide to Fixing Mic Issues Before Your Next Big Meeting
You hit "Join Meeting." The host greets everyone. You wave. You speak. Nothing happens. Just that hollow silence where your voice should be. Then comes the awkward typing in the chat: "Can you hear me?" followed by the inevitable, "Check your mic."
It drains confidence right out of the room.
Most people panic and start clicking random settings in Zoom or Teams while the meeting ticks away. That is the wrong move. You need to isolate the variable before you even join the call. We are going to skip the installed software bloat and leverage a browser-based diagnostic approach that gives you immediate visual feedback.
Why Guessing Games Fail
The underlying reason most mic issues persist isn't broken hardware; it is misconfigured routing. Your operating system might be sending audio to a virtual cable instead of your physical headset. Or perhaps the browser itself lacks permission to access the input device. Without seeing the actual audio stream, you are flying blind.
Static text indicators like "Microphone: On" lie. They only tell you the software thinks it is listening, not that it is actually receiving sound waves.
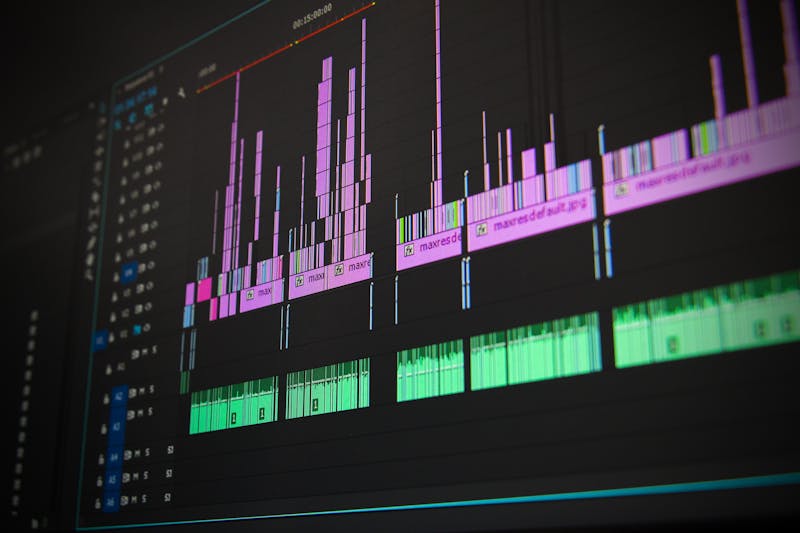
You need waveform visualization. When you see those jagged lines jump in real-time as you speak, you know the signal chain is intact from the diaphragm to the browser engine. If the line stays flat, the break exists somewhere upstream.
The Privacy-Safe Diagnostic Workflow
Forget downloading sketchy drivers or running heavy suite applications just to test a microphone. Modern browsers come with powerful Web Audio API capabilities that allow for instant analysis without installing a single byte of extra code.
Here is how you perform verification of your audio pipeline in under three minutes.
Step 1: Leverage a Dedicated Online Tester
Navigate to a reputable, client-side mic testing tool. The key driver here is privacy. Ensure the platform explicitly states that audio processing happens locally within your browser session. No data should upload to a remote server. You are performing configuration checks, not recording a podcast yet.
Once the page loads, the site will request permission to use your microphone. This is the first hurdle. If you click "Block," no amount of tweaking internal app settings will make you heard. You must grant access right away.
Step 2: Select the Correct Input Source
This is where things usually go sideways. Your computer likely sees multiple inputs: the built-in laptop array, your USB headset, maybe even a virtual camera driver.
Do not assume the default selection is correct. Open the input dropdown menu within the tester interface. Carry out selection of your specific hardware device. If you are using a high-quality USB condenser mic, ensure the tool lists that exact model name, not just "Default Device."
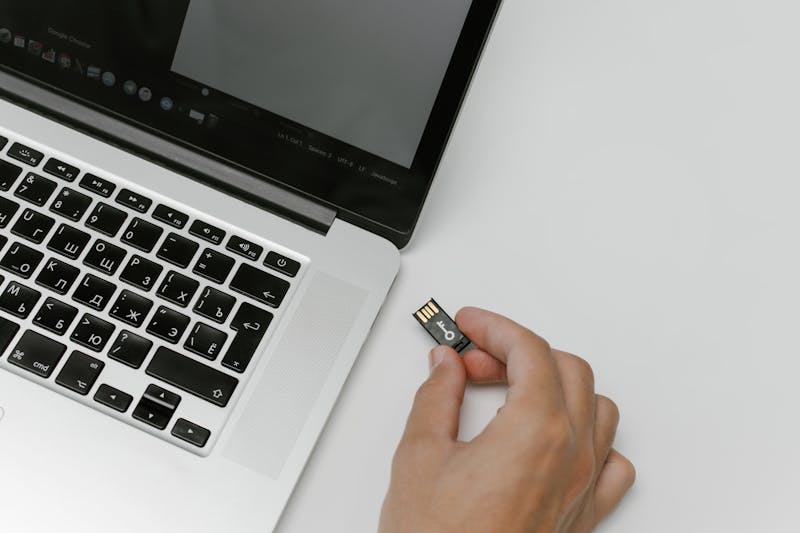
If your device does not appear in the list, the issue is not the website. It is an OS-level recognition failure. At that point, stop troubleshooting the browser and check your physical connections or system sound preferences.
Step 3: Analyze the Waveform Dynamics
Now, speak. Do not just say "test." Read a sentence from your actual presentation script. Why? Because different phonemes trigger different frequency responses. A flat "ahhh" might pass, but rapid consonants could reveal clipping or dropout issues.
Watch the visualizer.
- Active Movement: The bars or lines should dance vigorously with your voice volume.
- Silence: If you are shouting and the display remains a flat line, the browser is not receiving data.
- Static Noise: If the waveform jitters constantly even when you hold your breath, you have a noise floor problem. This often points to electrical interference or a gain setting that is too high.

Diagnosing Specific Audio Artifacts
Seeing the wave is half the battle. Interpreting what that wave tells you about your hardware health is the other half.
The Echo Chamber Effect
Sometimes you can hear yourself perfectly, but others complain about an echo. This rarely means your mic is broken. It usually means your output is bleeding back into your input.
If you are using speakers instead of headphones, the sound from the speakers enters the microphone, creating a loop. The waveform will show continuous activity even after you stop speaking. The fix? Put on headphones. It is that simple. There is no software patch for physics.
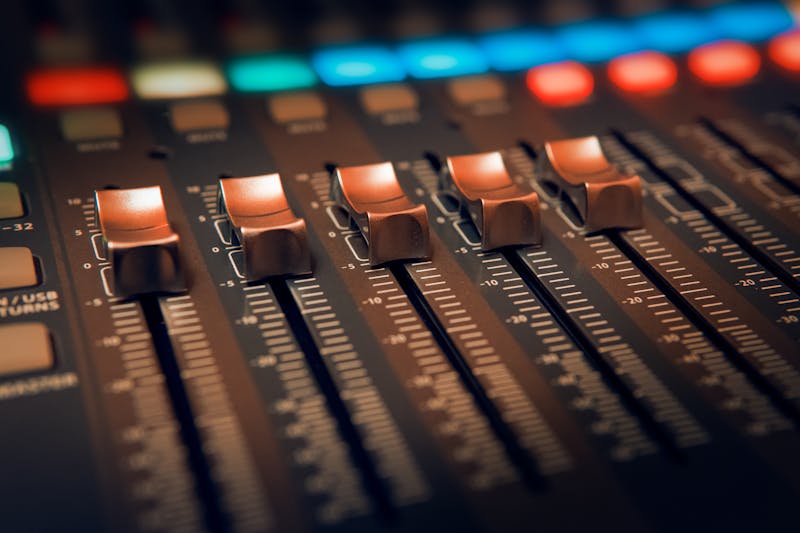
The Robotic Voice or Clipping
If the waveform hits the absolute top and bottom of the graph instantly, you are clipping. Your voice sounds distorted, robotic, or crunchy. This happens when the input gain is set too high.
You need to lower the input volume. Go into your system sound settings or the physical gain knob on your interface. Reduce the level until the peaks of your waveform stay within the green or yellow zones, avoiding the red entirely. This ensures headroom for loud laughs or sudden exclamations without distorting the signal.
Permission Errors and Browser Quirks
Even with perfect hardware, browsers can be gatekeepers. Chrome, Firefox, and Safari handle permissions differently, especially after updates.
If the tester shows no activity despite selecting the right device, check the address bar. Look for a small camera or microphone icon with a red "X" or a slash through it. Click it. Change the setting from "Block" to "Allow." Then refresh the page.
Sometimes, the browser caches a bad permission state. Clearing the site data for the tester page forces a fresh permission prompt. This small step resolves a significant extent of "ghost" mic failures where the OS says everything is fine, but the browser refuses to listen.
The Pre-Call Checklist for Confidence
Before you join that critical interview or client pitch, run this sequence. It takes less time than making coffee, yet it saves you from the humiliation of technical difficulties.
- Connect Hardware: Plug in your headset or mic. Wait for the OS chime confirming detection.
- Open Tester: Launch your privacy-focused online mic tool.
- Grant Access: Allow microphone permissions immediately upon prompt.
- Verify Source: Manually select your intended device from the dropdown.
- Speak and Observe: Confirm dynamic waveform movement matching your voice intensity.
- Check Noise Floor: Ensure the line goes flat when you stop talking.
- Test Playback: If the tool offers playback, record a short snippet and listen for clarity.
Stop Gambling with Your Audio
There is no excuse for showing up silent in an era where validation tools are one click away. Relying on the hope that "it will work this time" is not a strategy; it is a risk you do not need to take.
By leveraging these instant, visual diagnostics, you shift from reactive panic to proactive control. You verify the signal path. You eliminate the guesswork. You ensure that when you finally unmute, your message lands exactly as intended—clear, crisp, and professional.
Your voice matters. Make sure the technology lets it through.
설정을 테스트하기 준비가 되었나요? 단 몇 초만 걸립니다.
추천 도구
인터넷 지연 시간(Ping) 및 안정성 테스트
네트워크 연결의 안정성을 온라인에서 테스트하세요. Ping 지연 시간, 네트워크 지터, 패킷 손실률을 실시간으로 모니터링하여 게임 렉이나 비디오 버퍼링 원인을 찾아냅니다.
모바일 센서 감지 - 자이로스코프 및 가속도계
스마트폰과 태블릿의 내장 센서를 정밀 검사합니다. 자이로스코프, 가속도계 및 방향 센서 데이터를 실시간으로 읽어 기기의 모션 감지 기능이 민감한지 확인합니다.
온라인 웹캠 테스트 - 카메라/비디오 작동 확인
웹캠이 정상 작동하는지 빠르게 확인하세요. 화면 선명도, 해상도 및 초점 상태를 점검할 수 있습니다. 좌우 반전, 스냅샷 촬영을 지원하며 화상 회의 전 필수 점검 도구입니다.
휴대폰 진동/햅틱 기능 테스트
휴대폰의 진동 모터가 정상 작동하는지 온라인에서 확인하세요. 지속 진동, 펄스 진동 등 다양한 모드를 제공하여 기기의 햅틱 피드백 강도를 테스트합니다.
브라우저 알림 푸시 테스트
웹 푸시 알림 기능을 온라인에서 테스트하여 브라우저와 OS의 알림 권한 설정을 검증합니다. 사용자 지정 테스트 메시지를 전송해 알림 미수신 문제를 해결하세요.
주사율(Hz) 실시간 측정기
현재 화면의 실시간 주사율(FPS)을 원클릭으로 확인하세요. 모니터가 120Hz, 144Hz 또는 240Hz 고주사율 모드로 정상 작동 중인지 검증하고 화면 부드러움을 체크합니다.