Is Your Screen Haunted? How to Diagnose Ghost Touches and Dead Zones
You tap an icon. Nothing happens. You lift your finger, and the phone registers a swipe you never performed. It feels like the device has developed a mind of its own, or perhaps a ghost is living inside the glass. This isn't supernatural activity; it is a hardware failure manifesting as "ghost touches" or "dead zones." These flaws destroy productivity and make gaming impossible. Guessing won't fix it. You need to carry out a systematic diagnosis of the capacitive layer to uncover the underlying reason for the erratic behavior.
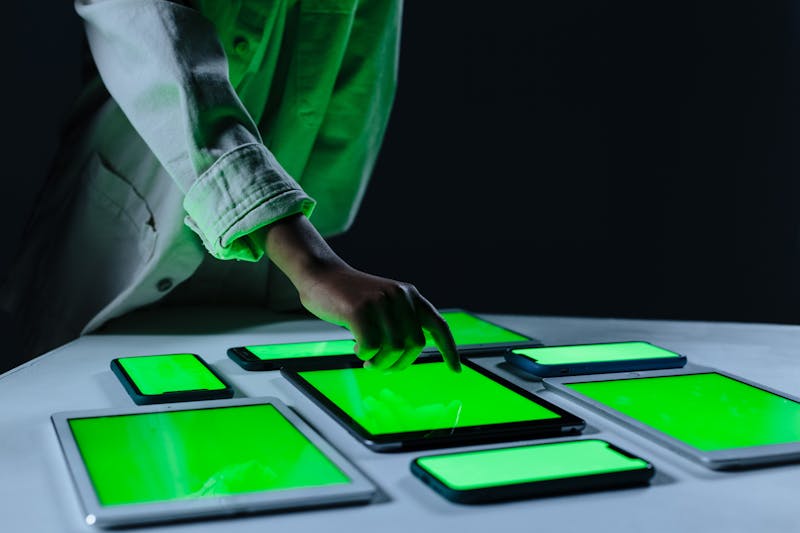
Most users simply reboot the device or wipe the screen with a cloth. That approach rarely solves the problem if the digitizer itself is compromised. To truly understand what is happening beneath the surface, you must leverage a professional multi-touch detector tool. This software allows you to perform visualization of every single contact point the screen registers, exposing latency issues as well as phantom inputs that the operating system tries to hide.
The Hidden Cost of Ignoring Touch Anomalies
When a screen starts acting up, the immediate reaction is often frustration followed by resignation. People assume it is just a software glitch that will go away. It won't. A failing digitizer tends to degrade over time, turning minor annoyances into total unresponsiveness. If you are considering buying a second-hand device, these hidden traits can cost you hundreds of dollars down the line. A seller might claim the phone is "perfect," yet the top right corner could be completely dead, or the center might register double taps constantly.
You cannot rely on normal usage to find these defects. Daily interactions do not stress the touch controller in a way that reveals edge-case failures. You need to carry out testing procedures that force the hardware to report its true status. By employing a dedicated diagnostic utility, you shift from passive observation to active investigation. This change in approach makes it possible to identify whether the issue stems from a cracked internal layer, poor grounding, or a fried controller chip.
Step One: Granting the Necessary Permissions
Before you can perform any meaningful analysis, you must set up the environment correctly. Modern mobile operating systems sandbox applications tightly, meaning a diagnostic app cannot simply "look" at your touch events without explicit consent. The first action you need to take is to install the multi-touch detector and then proceed to grant it the required overlay permissions.
Navigate to your system settings and locate the accessibility or display overlap section. Here, you will enable the capability for the tool to draw over other apps. Without this permission, the visual feedback layer cannot render, and you will be blind to the data stream. Some devices also require you to activate USB debugging or specific developer options to allow the app to access low-level input streams directly. Do not skip this configuration work. If the app lacks the authority to intercept input signals, the test results will be useless.
Once the permissions are active, launch the tool. You should see a blank canvas ready to receive input. At this stage, the app is standing by, waiting to capture and process every electrical fluctuation detected by the sensor grid. It does not judge the input; it merely records it. This neutrality is exactly what you need to separate user error from hardware failure.
Step Two: Executing Live Sensitivity Tests
Now comes the hands-on part. You are going to carry out a series of deliberate interactions designed to map the entire surface area of the display. Do not just tap randomly. Adopt a structured pattern. Start by dragging a single finger slowly across the edges, then move to the center. Watch the screen closely. Does the tracker follow your finger smoothly? Or does it jump, stutter, or leave gaps?
For a thorough examination, perform a multi-finger stress test. Place three or four fingers on the glass simultaneously and rotate them. A healthy screen will maintain distinct contact points for each digit. If points merge unexpectedly or vanish entirely, you have identified a zone where the controller is struggling to handle parallel inputs. This is common in cheaper replacements or screens that have suffered impact damage.

Pay attention to the "ghosts." Remove your hand completely from the device. Rest it on a non-conductive surface. Look at the diagnostic overlay. Are there still dots appearing? If the tool registers touches when no skin is present, you are dealing with ghost touches. This phenomenon often occurs due to electromagnetic interference, a damaged shielding layer, or moisture trapped inside the assembly. In some cases, a poorly grounded charger can induce this behavior, so try running the test on battery power alone to rule out external noise.
Latency is another critical factor. When you tap quickly, does the visual marker appear instantly? Or is there a noticeable delay between your physical action and the digital response? High latency ruins the feeling of direct manipulation. It makes typing feel sluggish and gaming feel unfair. By observing the timing of the rendered points, you can gauge the responsiveness of the touch controller. If the lag is inconsistent, the underlying driver or the hardware connection might be failing intermittently.
Step Three: Interpreting the Data and Making Decisions
After you have finished running the sensitivity checks, you need to analyze the output. The goal here is not just to see pretty colors on the screen but to derive actionable conclusions. Look for patterns. Did the dead zone appear only in one specific corner? Was the ghost touching concentrated around the edges? These details tell you whether the problem is localized or systemic.
If you discover a large dead zone that prevents interaction with key UI elements, the screen assembly likely requires replacement. No amount of software tweaking will recover a physically broken sensor grid. However, if the ghost touches only happen while charging, the issue might be with the power adapter or the cable rather than the phone itself. Swapping the charger could resolve the interference immediately.

For those validating a recent repair, this workflow is essential. Technicians sometimes install low-quality aftermarket parts that pass basic functionality tests but fail under stress. By leveraging this rigorous testing method, you can demand accountability. Show the technician the live feed of the ghost touches. Prove that the new screen does not align with the expected performance standards.
If you are optimizing a tablet for stylus work, precision is paramount. Even minor latency or jitter can make drawing feel unnatural. Use the tool to find the "sweet spots" where the digitizer performs best, or conversely, identify areas to avoid for fine detail work. In professional contexts, knowing the limitations of your hardware allows you to adapt your workflow accordingly.
Stop Guessing and Start Testing
Hardware health is not a mystery to be solved by intuition. It is a measurable trait that responds to empirical testing. When your screen behaves strangely, do not settle for vague explanations. Take control of the situation by employing a dedicated diagnostic approach. Grant the permissions, run the live tests, and interpret the results with a critical eye.
Whether you are protecting yourself from a bad purchase, verifying a repair job, or simply trying to understand why your device feels "off," this three-step process provides the clarity you need. Ghost touches and dead zones are symptoms of a deeper issue. Uncover them before they compromise your entire workflow. The screen is the primary interface between you and your digital life; ensure it responds exactly as it should, without hesitation or hallucination.
설정을 테스트하기 준비가 되었나요? 단 몇 초만 걸립니다.
추천 도구
온라인 헤드폰/스피커 테스트 - 좌우 채널 확인
전문적인 오디오 장비 테스트 도구로, 헤드폰과 스피커의 좌우(L/R) 채널 밸런스, 저음 효과 및 음질 왜곡 현상을 정밀하게 점검하여 사운드 출력을 최적화합니다.
주사율(Hz) 실시간 측정기
현재 화면의 실시간 주사율(FPS)을 원클릭으로 확인하세요. 모니터가 120Hz, 144Hz 또는 240Hz 고주사율 모드로 정상 작동 중인지 검증하고 화면 부드러움을 체크합니다.
비디오 디코딩 성능 테스트 - 4K/8K 재생 점검
브라우저와 기기의 비디오 디코딩 성능을 온라인에서 확인하세요. 4K/8K 고화질 영상 테스트를 지원하며, 재생 끊김, 프레임 드랍, 화면 깨짐 및 싱크 불일치 문제를 빠르게 진단합니다.
터치 스크린 테스트 - 멀티 터치 점검
스마트폰이나 태블릿의 멀티 터치 개수와 반응 속도를 검사하는 전문 도구입니다. 드로잉 테스트를 통해 터치 끊김, 데드존(Dead Zone), 감도 문제를 진단하세요.
조도 센서(Lux) 감지 테스트
기기 조도 센서의 밝기 데이터(Lux)를 실시간으로 읽어옵니다. 스마트폰이나 노트북의 자동 밝기 조절 기능이 정상인지 확인하고 주변 빛의 강도를 모니터링하세요.
브라우저 알림 푸시 테스트
웹 푸시 알림 기능을 온라인에서 테스트하여 브라우저와 OS의 알림 권한 설정을 검증합니다. 사용자 지정 테스트 메시지를 전송해 알림 미수신 문제를 해결하세요.